Friday, February 18, 2011

Quick! 101


Hola!
Last night I was happy to find a very quick and easy recipe for raw chili on uncooking101.com.
http://uncooking101.com/site/raw-food-recipe/chili-con-corn/
It was fantastic! Flavourful, fresh, exciting and most of all, quick!

This has inspired me to post the very quick raw parsnip apple soup I whipped up the other day. I forgot to take a pic of the final product but you can imagine it looked like a bowl of white soup.

Instant Parsnip Apple Soup

3 large organic parsnips, peeled and roughly chopped
1 sweet organic fuji apple, core removed and chopped, skin on
a little bit of white onion, maybe 1/4 or 1/6 of a medium onion
1 cup home made almond milk (4 cups spring water, 1 cup almonds, blend, nut milk bag strain)
a touch of coconut oil, maybe 1 teaspoon, more if you want
some spring water, as much as it takes to get everything flowing but not to dilute too much
2 hefty pinches sea salt

Put everything in a vita mix blender and blend until smooth, adding more water as needed and taste for salt and stuff.

(I can't remember if I put a touch of fresh lemon juice in here, I don't think I did but if you feel the soup 'needs something' try a tiny squeeze

Not going to lie, I had made some almond milk earlier that morning and added a bit of vanilla bean to it, so if you are feeling adventurous add about 1/16 - 1/8 tsp of vanilla bean powder to your soup.

Let me know what you think!

Friday, February 4, 2011

For Cookie Lovers


If you don't like cookies, you can leave. Right now. Go.

Hello cookie lovers!
It has been quite some time since my last post. I've been adventuring in Costa Rica and over the past two weeks since I've been home I have been non-stop graphic designing. I have barely had time to cook for myself! (not complaining, just making blog absence excuses).

I hope everyone had a wonderful holiday season with fantastic food and full bellies. While I was in Costa Rica I had about 4 coconuts a day, and it was awesome. I also ate many papayas, pineapples, cocoa nibs (visited a chocolate farm!) and perfectly ripe avocados. Um, heaven.

This post has nothing to do with the food I made while in CR but I did make a couple of fun meals down there so I'll devote another post to that later.

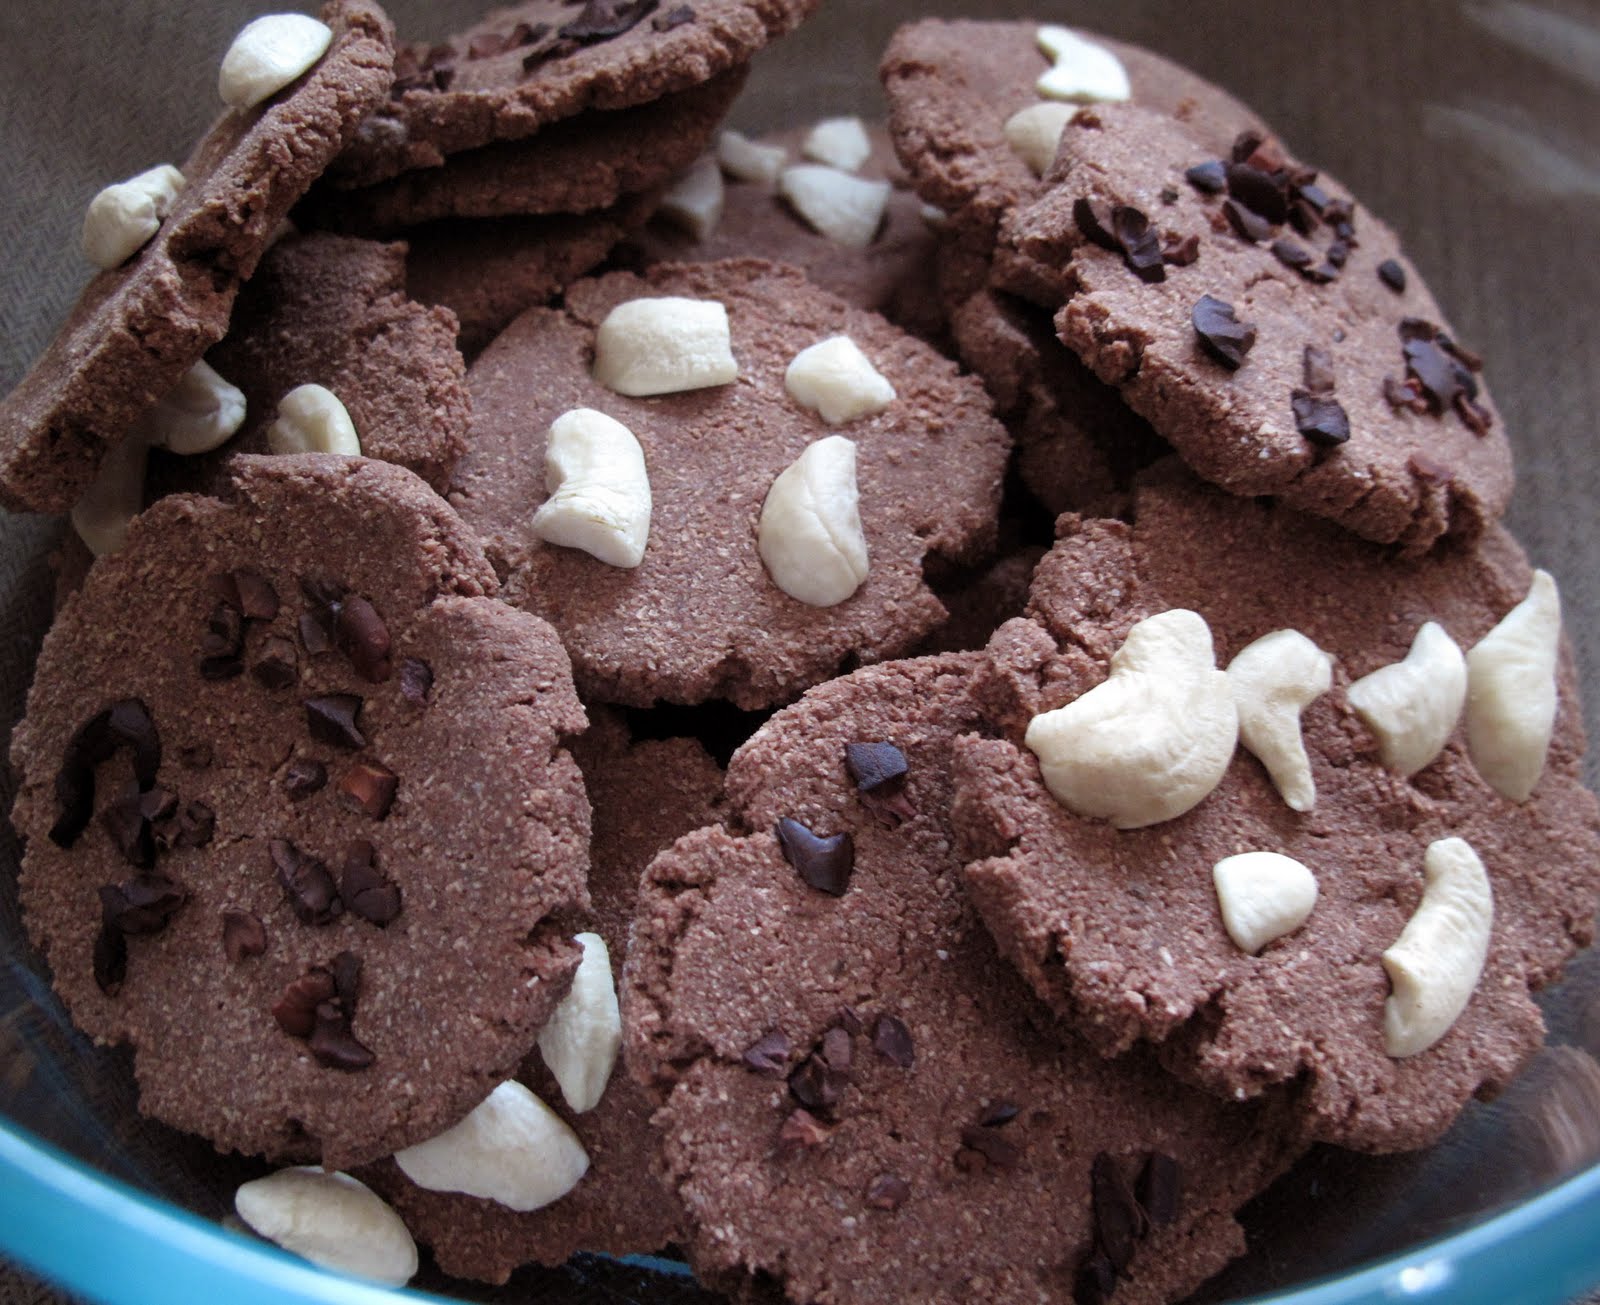
Sitting at a computer desk (er kitchen table) doing work all day can make you a bit sluggish, so I decided to re-enter the dehydrator world with some chocolate cookies to add some zip to my design. I just started throwing ingredients together that I thought might make a decent cookie.

Chocolate Lucuma Cookies:

1 cup raw coconut flour
2 tbsp lucuma powder
3 tbsp raw cocoa powder
1/8 tea sea salt
¼ cup + 1 tbsp raw almond butter (I used the awesome Artisana brand butter)
1 tbsp raw coconut syrup (sub agave or other sweetener)
1/8 cup coconut oil, melted (be careful not to heat too much)
1 teaspoon vanilla extract
2 drops plain liquid stevia
2 tbsp ground chia seeds
9-13 tbsp spring water
1 teaspoon cider vinegar

Mix together dry ingredients

Mix together wet ingredients except water

Add all to food processor and mix until it forms a big ball of dough, adding the water one tablespoon at a time until the dough sticks together and forms that ball.


Break off pieces and roll into small balls in your palm and flatten with bottom of cup that has been dipped in water so it doesn’t stick.

Lightly press cashews, cocoa nibs or something else (like goji berries, walnuts, etc) into the top of each cookie.

Dehydrate on teflex sheet at 115 until dry. You can also leave a bit moist in the middle if you want a softer cookie. Overnight should be just fine.


I then whipped up a quick batch of chocolate to coat the cookies in. I didn't really measure anything but basically I added equal parts melted cocoa butter and raw cocoa powder with some vanilla, powdered sea salt, coconut syrup, liquid stevia and some flavour in the form of essential oils. I separated the chocolate into 3 parts, adding lavender essential oil to one, orange to another and kept one plain.
I coated the cashew topped cookies in the lavender chocolate, the plain cookies in the orange oil chocolate and the cocoa nib topped cookies in the plain chocolate. What fun!


I then placed the cookies in the freezer until the chocolate was set (less than half hour) and then put them in a covered container on the counter. I know they won't last long in this house, but if you aren't going to eat them all in a couple days, you might want to put them in the fridge (or if you live somewhere warm, put them in the fridge).


I will say that my first batch of raw cookies turned out pretty good. Yay raw cookies!

Friday, December 31, 2010

Julie and the Chocolate Factory


Happy Holidays to you all! I am going to share with you all of the hard work I put into Christmas gifts for family and friends this year.

I refuse to take it easy and do one thing at a time, so amongst all of the other holiday madness, designing two new menus for my place of work and doing multiple other design projects, I decided to open a temporary chocolate factory in my ant-sized kitchen. What fun!


I will admit that I started designing the labels back in November. So smart. I went to Calgary to Mona Lisa art store and got some pretty fun semi-transparent velum paper and some craft/postal parcel paper. Went to Nu-Roots in Canmore and got chocolate foils and all of my raw chocolate ingredients (cocoa butter, cocoa powder, cashews, essential oils, chocolate molds, etc.) and to a new artisan grocer across the road called Feast to get lovely vanilla beans.

I decided on the 4 flavours:
2 white - Lemon and Blueberry Rooibos
2 Dark - Cinnamon Chipotle and Orange Coffee

I love old movies (and some modern movies too) so I gave each bar a special movie theme name. I guess I started with the Lemon White Chocolate- I wanted to call it "Jack Lemon" (like the actor) and the other bars followed suit. I sent the wrapper files up to the printing company in town and got them to print on the special velum paper.

After writing down who was to get the chocolates and how many, I was suddenly seeing 60-80 bars in my future! Did I mention that my freezer is smaller than any normal freezer and can only fit two three-bar molds at a time? No big deal.

Happily making chocolate, I realized I would need more cocoa butter from Canmore. I drove in, only to find out that Nu-Roots was totally out, as was Nutters, and there would likely be some coming in AFTER Christmas! Oh crap! Chocolate factory halted.

The week before Christmas I happened to call my friend Brooke who was going to Nu-Roots and asked her to keep an eye out for cocoa butter. By some Christmas miracle they had just received a new order of cocoa butter and it wasn't even on the shelves yet! (insert that sound the heavens make when they part and the sun bursts through). Chocolate factory commence.
Part 1: Melt + mix ingredients, pour into molds, freeze, pop out of molds, put back in freezer with like-flavoured bars.
Part 2: Foil wrap each bar, craft paper wrap each bar, label each bar, seal each bar with wax. The only downfall of the process was that I had to use scotch tape to seal the craft paper - how amateur.


This is the final product, after many hours of hard work, blood, sweat and sealing wax. (No blood or sweat contaminated the chocolate, but the odd cat hair may have).

Jack Lemon


Some Like it Hot

Orange Mocha Frappuccino!


Blue Suede Brew

(upside down on foil)


Julie's Chocolate Factory is temporarily closed for a two week vacation in Costa Rica!

Monday, December 6, 2010

Caesar was a Jerk with Great Taste Buds


I've been watching a few movies over the last couple of months concerning the fall of Rome. My those Roman's were a passionate and brutal bunch! I have been inspired to make a raw vegan Caesar salad (the orgies and disemboweling really made me hungry).

At the place I work we have a fantastic pink peppercorn based Caesar dressing and I wanted to replicate that minus the eggs, anchovies and garlic. Sounds lame doesn't it? Well... it's not!

Pink Peppercorn Caesar

The Dressing:
1 cup cashews
1 tbsp dulse, packed (to replicate anchovy flavour)
1/6 onion
1/8 cup olive oil
juice from 2 lemons, more than ¼ cup, less than ½ cup (ghetto measurements)
3 teaspoons hemp seeds (to add creaminess and an egg-ish taste)
6 wild pepper peppercorns
½ cup water
1 teaspoon pink peppercorns
1 teaspoon mild brown rice miso

Blend all in vitamix until smooth and creamy. I'm not going to lie, I did add about 1/6th of a clove of garlic. The Roman's are a bad influence on me, but with such a small amount of garlic I didn't really have a reaction.

The Salad:
romaine hearts, torn into bite sizes pieces
capers
preserved lemon slices (if you preserve your own lemons - see earlier post somewhere on this blog - take about 1/3 of a preserved lemon, gut it and rinse the rind under water. Thinly slice the rind.
fresh pepper
pea shoots for garnish (optional)
pumpkin seed parmesan (if you have any)

Toss the romaine in a generous amount of dressing and place in bowl or on plate. Top with remaining ingredients. Indulge...

Would the Roman's be proud?


REVISION
I have made more sprouted lentil gnocchi and revised the recipe. I like this one better:
1.5 cups sprouted and dried lentils
6 teaspoons chia seeds
6 whole little wild peppercorns
½ teaspoon sea salt or more
-blend above in dry vita mix container to turn into flour
then transfer to mixing bowl
add approx 1 cup but start with half cup (add as needed) sun dried tomato soaking water (water, handful of sun dried toms, soak for an hour or more. Do something else with the tomatoes, you just want the flavoured water here)
¼ cup olive oil + a few tbsp maybe (not exact measurement, obviously)
fresh minced basil

Mix all together. This time, you want the dough to be wetter but still pretty easy to roll. It will be stickier but can be in the dehydrator for longer to warm up and not get dry. The sticky nature also means it won't hold those fun gnocchi fork tine marks but if you must have the marks, you can add them after they have been in the dehydrator for about 10 mins. Enjoy!

Tuesday, November 16, 2010

Winter BBQ


It started snowing yesterday and there is tons of snow on the ground, so I did the most logical thing I could think of: I made raw BBQ flavoured crackers with sun dried tomatoes.
Actually, I made them for my friends Kat & Cail who have to take a time traveling flight adventure to Australia on Wednesday. They will actually only fly for 14 hours, but they will never get to enjoy Thursday, November 18th. I hope these crackers make up for skipped time.

Instructions have been taken off for now..

BBQ Onion + Sun Tom Crackers


But the pictures are still pretty!

Thursday, November 11, 2010

Mustard Mushrooms in Movember


Hi all! Sorry it has been so long. I see you have your Movember mustaches on, so I made a perfectly manly snack to get caught in those whiskers. Lets cut right to the chase.

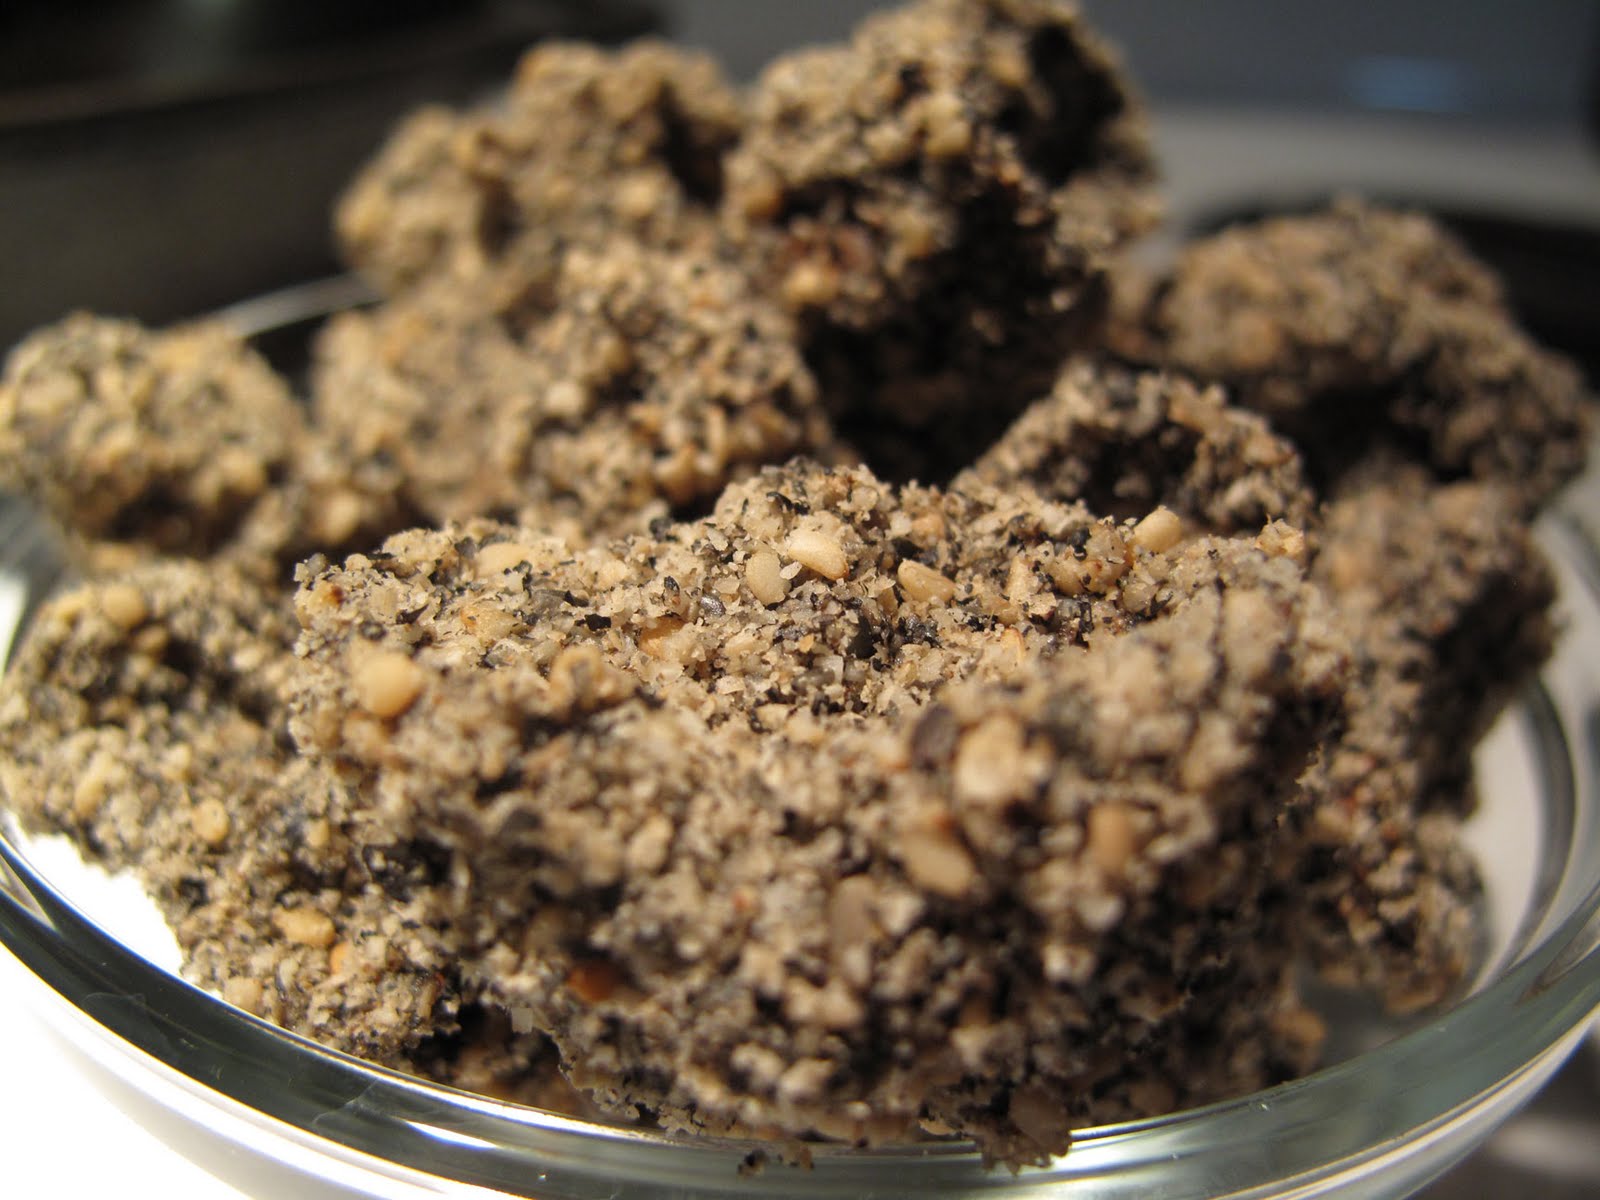
Mustard Mushroom Bits (Spicy Mustard Crimini Mushrooms w. Raw Sesame Crust)

The Mustard: (adapted from Sarma Melngailis' book 'Living Raw Food')

1/2 cup brown mustard seeds
3/4 cup apple cider vinegar
1/8 cup pinot gris (shop local if you can, I chose Sandhill from B.C.)
1/2 tbsp pink sea salt (or more to taste)
1/4 - 1/2 cup raw honey (yes, I'm aware that honey is not vegan... use agave if you want)

Soak the mustard seeds in water for an hour or more to take away some of the heat (but this didn't help me all that much, the mustard is still killer hot)
Rinse and drain seeds and put in blender with the remaining ingredients. Blend until smooth. If you taste the mustard at this point you will find it bitter and gross. Pour into dish/bowl and let sit in fridge for a few hours or overnight to get rid of the bitterness and allow the flavours to blend. Should last 1-2 weeks in fridge.

The Mushrooms:
2 6oz (170gr.) packages of organic mini crimini mushrooms, washed and sliced in half

Now for the unmeasured part:
a few tbsp, maybe ½ cup mustard from recipe above
a few tbsp olive oil
½ or ¼ red onion, chopped small

Put the mushrooms and onions in a large bowl. In a separate bowl put the mustard and olive oil. Mix with a spoon to combine well and pour over mushrooms and onions. Allow to marinate for a few hours.

Take a mixture of raw white and raw black sesame seeds (maybe 1/4 cup of each, maybe a bit more) and put them into a food processor or blender (I used the vita mix dry blade container) and blend for a very short time until fluffy and broken up (I think if you blend for too long you might end up with sesame butter). Pour into a separate bowl.
Add some sea salt to taste and mix.

One by one, add mushrooms to sesame seed crumbs and dab or carefully roll to cover in seeds. Try and make sure to have some onion bits on each mushroom for extra flavour before adding to sesame seeds. Place on teflex lined dehydrator sheet and dehydrate at 105 for about 8-16 hours (until fully dry inside). If you are planning to eat them right away then you don't have to wait until they are fully dry, there is a bit more flavour if they aren't totally crispy.

I considered spraying them with oil after they were coated for that deep fried feel, but I didn't. Might be good though. I also might add some pepper or herbs to the outside crust next time for some added flavour, but overall these are a fun little snack. Dip them in mustard for extra zing (you will have lots of mustard left over).


I went out last night to a bar for a friend's snowboard video premier. After one too many tequila waters I found myself at home devouring the whole lot of mustard mushrooms... guess I'll have to make some more...

Sunday, October 24, 2010

Lemon Curd


Do you have a food in your life that when you eat it, it is usually by the spoonful and you can't stop and you keep going back for more and more? That is my relationship with lemon curd (or used to be when I ate dairy and eggs). I think most people feel this way about peanut butter as well.

My friend Brooke and I were talking about lemon curd and our love for it, so I decided to create a raw vegan version.

Lemon Curd:
1 cup young thai coconut meat (preferably not too thick so it breaks down fully in the blender and becomes very smooth)
1/2 cup plus 1 tablespoon fresh squeezed lemon juice (I include the pulpy bits from juicing because hey, why not?)
2 tablespoons fresh lemon zest
3 drops plain liquid stevia (optional, you can just add more agave)
3 teaspoons agave (or more to taste if you like things quite sweet)
2 tablespoons coconut oil


Blend all in vita mix or high speed blender until totally smooth but be careful not to heat up the mixture too much. Those high powered blenders have a tendency to cook food if you are not careful.

You can add about 1/16 or 1/8 tsp of tumeric for colour, but be careful not to get the flavour - start out with small amounts. I will get some fresh tumeric from Calgary next time I go in and see how that plays with the colour and flavour. As you can see, I did not add any colouring to mine today.

Oh my gosh I love lemon curd!